Showing posts with label homemade. Show all posts

Thursday, December 22, 2011

Impromtu

My family like many has a lot of birthdays in November.  Makes sense when you think about it. . . Valentines Day and all that.  All the same some how each birthday seems to creep up on me.  I know they are coming but they just keep coming.  About a week ago I heard my brother was coming into Raleigh to hang out, so I went over an spent some time with him.  Not much time since he came into Raleigh to play golf.  While he was away my nieces and I hatched a plan: an impromptu b'day celebration.  Seeing as somehow we were stranded without a car we had no choice but to use what we had.  This was our creation.  With the use of tissue paper, paper, the two candles in the house and the baking goods we could find this is what we came up with. . . whatcha think?


The cakes looked a bit funny but tasted great, they were crushed pineapple and strawberry upside down cakes.  In the end my brother was surprised and the cakes were crushed.

Thursday, December 15, 2011

Repurpose and reuse

I am super cheap/tight... this is in every aspect of my life: including house decor.  I am always looking for a neat but cheap way to spruce up the place.  Today's escapade: Jars.

I always have a million jars that are left from spaghetti sauce, jam, you name it.  I don't recycle (I know the horror!) for three reasons 
1. I have to pay for it
2. The recycling process actually depletes the ozone layer
3.  I like re-purposing things

So this is my use of it for now: one is for my sister's wedding but for now I will use them as a centerpiece, candle holders and glasses

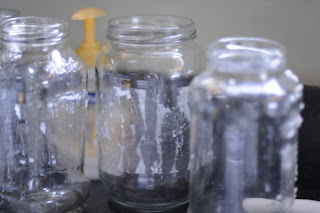
Super easy: mainly takes patience to get all the goo off... and thus I use Goo Gone 


Tuesday, November 15, 2011

Heave ho

One of the many gifts the previous owner left us was random pieces of rebar in the yard and deep holes scattered about.  They had Pit Bulls, and a lot of them from what I hear.  They liked digging... my only guess. But alas it is our job to work it out.  So Chris ever so kindly volunteered to remove them... they were humorously deep... after he got the piece of rebar out there were legitimately multiple holes around the yard where Chris can actually disappear up past his knees... 

I still can't figure out what needs to have rebar dug that deep?   It wasn't a base of a building.


Tuesday, November 8, 2011

Fail to awesome

So one of the most awesome things about yard sales is really awkward framed "art".  Why is it so awesome? Because you can get them for $0.25 and revamp them!  One of our neighbors had a moving sale, so I guess past neighbors now, and was getting rid of this framed drawing?  painting?  print?  Wasn't really sure I got it for the actual frame and matting.  


Step one: take off that weird brown parchment paper off the back.


Step two: pull out matting, painting/print thing and glass


Step three: clean glass, have a photo/print/etc ready

Step four: fix frame/modge podge/paint (my case put over the base brown a crackle glaze and then a white matte paint)


Step five: put it all back together

It goes from being a terrible weird framed thing to a cheap yet usefully awesome piece of art!


Sponsored by: 

Friday, October 28, 2011

I did the "Mash"

 was working in the lab late one night
When my eyes beheld an eerie sight

Thanks again to an amazing challenge: Halloween Decor
I took on the... MASON JARS (insert scary "tones")

My goal: make them look like specimen jars.

I got these jars from a friend getting rid of some stuff.

Step one: clean the jars


Step two: make sure you have what's required.  you can fill the jars with a great deal of things but you need food coloring!


For my dismembered and messed up things I used fruits and vegetables

Step three: (for me) peel the oranges (making them look like gooey eyeballs) and place in one jar, then use the peel (looks almost like flattened intestines) in another jar.   


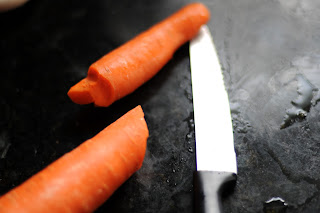
Step four: Dismembered fingers!  I used carrots.  Cut off the smaller half


Step six: use the knife to sliver off a bit in the tip (like a finger nail) and then score around that (like a cuticle) and do small half moons about mid way for a knuckle


Next step: shrunken head! Take an apple (this is the most difficult), peel it (I threw this peel into the same jar as the orange peel) and then widdle away pieces till it resembles a face (focus on the eye, nose and mouth... makes it look the most like a head).  Set it on a plate in the sun (indoors).


Step Seven:  wait 2 days for the apple to dry out.


Step Seven point five: put water in the jars and use your food coloring to add a disturbing color to the mix (but be careful not to over do it or you can't see the specimen.  Wash your hands well, screw the top on, wipe down the jars and place them where you want them on display.


Then you can Mash
You'll catch on in a flash

Tuesday, October 11, 2011

Scrappy, that's what I am

I love making use of seeming useless things.  I got given a bag full of "scrap" material.  You know when you buy material specifically for a project and then have some material left over, seemingly not enough for another project.  Well, this time I decided to make something... a blanket!  I haven't decided what to do with the blanket yet but it is made :P


I lay the pieces out and try and make a pattern of some degree


After deciding the order/patter I start putting it together in strips and then sew those strips together


This particular day I got two blankets out of the scraps!  Next time you go to throw out your scraps ... send them to me ;P  You thought I was going to be all inspiring... nope, just want free stuff.

Tuesday, August 30, 2011

Finalle


The last and final week!

One of the last steps: put hanging stuff on it. Yes, that is the technical term.

I bought this kit within a few weeks of Chris and my wedding and I have used the junk out of it!

It has most all of what you would need to hold an average picture


I'm slightly OCD so I have to make sure that the two things were even on each side. I used 2 just to be careful... not because I have granite necklaces... but that would be pretty, heavy but pretty.


It is all done and hung... now just put all the lovely and amazing jewelry up!


Tuesday, August 23, 2011

Officialy a series... so I guess not epic

Next is getting something for the jewelry to hang on... seeing as that was the reason for this whole thing.

I resently was given one of those ridiculously big bags of random buttons and we have so many different types of screws lying around the house because of this project and that project that I didn't look any further.

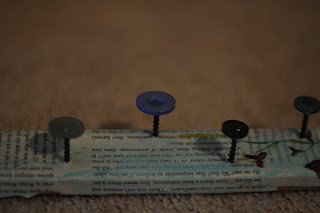
I went into the back and grabbed the first flat head screws I could find and drilled them into the frame but only partically of course.  

Then I took my handy dandy modge podge ( I would have used super glue but ours dried up... who know they did that... I guess I break so much stuff I have never had to worry about it.  OH!  I guess that means I am getting less clumsy.) dabbed a pretty large drop on each one


Then topped each with a button.  I did a grouping of muted colors in the "cool" color family but random sizes and textures.


Kept the frame on its back for about an hour and then it was good to go.