Showing posts with label home. Show all posts

Tuesday, January 31, 2012

Ways to save

One of the great things about owning a house is also the worst: you own a house.

Our house we bought a few years back is an older stick built home that has it's issues one of which is really bad windows.  Pretty sure they are made of thick pieces of plastic and gum.  Everyday I can feel air breezing through them and making it's way into our home... not a fan.

This winter I decided to do something about it.  I went to my local hardware store and picked up window insulation kits and I will show how I installed them and hopefully save you some time and irritation that I endured. 

You will need the appropriate number of kits (most kits do about 5 windows)
Damp rag (and I also used a tooth brush)
Scissors
Tape (just in case: great for patching a small burned hole in the plastic)
Hair dryer

First and foremost you will want to remove any curtains or blinds you have up to give yourself the free window.  Then wipe down all the surface: focus on clear and dust free corners: VERY IMPORTANT.


I used a old tooth brush to make sure that corners were free of debris.  Keep scissors handy at all times during this process


Next (after the paint is fully dry from the wipe down) use the adhesive that comes in your kit and roll your way around the window you will want to be about an inch of space from the actual window as to make sure the plastic has room to move if necessary.  After you have the tape exactly where you want it press down firmly and run your finger over the length of the adhesive (leaving on the cover).  Let sit for upwards of ten minutes the adhesive will adhere to the paint and stick much better if you allow between 10-20 minutes of rest before moving on.  I would start one window and move on to prepping a few then jump back over.
By Rachel Abi


Make sure that your tape over laps: you want no place for air to escape. 


Next measure out and cut the plastic to cover the window with an extra amount (about an inch or so) of plastic on each edge past where it will attach to the adhesive.


Slowly making your way around the window remove protective strip from outer line of adhesive.


Now it is time to attach the plastic

Start at the top center.  Slowly work your way evenly down the sides.  The lest extra and wrinkles you have the better but you also don't want it super taught (not that you will be able to get it really taught but as a warning just in case).


Some of my corners didn't adhere as well as you would hope I cheated and added some extra tape on the edge just in case the adhesive didn't hold.


Now it is time to use your hair dryer: when you start the process choose a corner and slowly work you way out.  Don't get the hair dryer too close or you will burn a hole but don't leave it too far or it won't do the trick (ie: don't go closer than 1").  When you start the window will start to look like the picture above.  Slowly working your way around the window the plastic will get clear and taught.


Till finally it is just like looking out a regular window and no one but you and your energy bill will be the wiser.

It is worth it in the end but it can take a while to get in your groove.  If you have to do two windows a day for a week: then it won't take up a chunk of the day. 

Tuesday, December 20, 2011

Grout, seal, paint

Next step is grouting!

It is very important that you keep the grout on the wet side.  If the grout is too dry the grout will dry out and crack... not a good thing if you couldn't guess.

These are the tools you will need.

Rubber Gloves
Grout Float
Something to scoop out the grout out.


All you have to do is use the float across the tiles pressing down into the cracks and scrape off the extra pushing it to other cracks still needing to be sealed in.  Use the rounded counter to scrape edges to give a bit of a divot.


After a 24 hours of drying  (do not walk on it) it is time to seal the grout.  We used a simple spray can as our sealant but there are many options. 


Next stop prepping the walls!


Where the wall has bumps and divots it has to be fixed before painted.

I use a puddy knife to remove bumps on the wall.
Do any sanding that is needed and wipe walls before trying to puddy in holes.


After the puddy has dried sand anything thing that is necessary and then wipe down the walls again before starting to paint.


Personally I like to start with the edges.  The key of edge work is patience.  You can use the special tools specifically used for edges or tape but I prefer to go slowly cause both tape and the edging tools leave a line of unpainted wall.


First layer down and more to go

Thursday, December 15, 2011

Repurpose and reuse

I am super cheap/tight... this is in every aspect of my life: including house decor.  I am always looking for a neat but cheap way to spruce up the place.  Today's escapade: Jars.

I always have a million jars that are left from spaghetti sauce, jam, you name it.  I don't recycle (I know the horror!) for three reasons 
1. I have to pay for it
2. The recycling process actually depletes the ozone layer
3.  I like re-purposing things

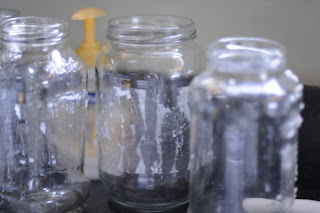
So this is my use of it for now: one is for my sister's wedding but for now I will use them as a centerpiece, candle holders and glasses

Super easy: mainly takes patience to get all the goo off... and thus I use Goo Gone 


Tuesday, December 13, 2011

Tiling All By Myself, Don't want to be. . .

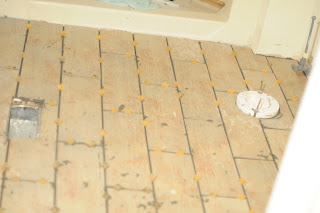
So the first time we decided to tile I was intimidated but this time I was even more so if that is possible.  Chris was away and it needed to be done so I had to do it by myself and figure out how to cut a circle into what is essentially a rock.  I don't do well when there isn't someone there to get opinions from.  But I marched on and it was much MUCH more simple then I thought it would be.

Sweep off the durrock make sure there are no stray dirt or clumps of any kind


Make sure you have a wet saw with diamond blade waiting ready to roll, we got ours for like $50 when it was on sale.


With a space as small as our bathroom you can start on one side of the room and then move across to the other, in larger rooms you need to start in the middle and work out in quarters of the room.  I laid out all the tiles and measured out and marked all the tiles I would need to cut.


After cutting all the tiles to the right size I laid them all out again to make sure that they fit well then I pulled them up in lines and moved to mix the mortar.  The directions are on the bag you buy but basically mix and mix and mix.  You're better to go on the watery side then dry side... too dry and your tile won't stick... then again too wet and it won't stick either.  Basically it should be more wet then the texture of cookie dough but not as thin as egg nog?  I don't know if that helps


I found that doing different strokes was more fun then straight lines.  Online they said it was better for making the tile stick but nothing to prove it... so you can judge fro yourself.

When you place the tiles down evenly distribute some of your weight onto the tile so that it is fully pressed into the mortar.

Make sure to place spacers down around each tile to keep the spacing you want.


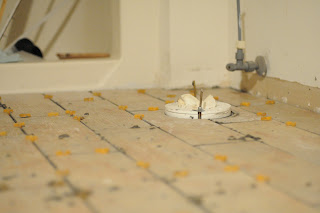
Jumping back to when you cut, cutting the circle with our wet saw is basically a long patient process.  You have to cut out sections and then use the blade to almost sand off the really uneven pieces.


When you are mixing the mortar and the grout I would suggest wearing a mask for the dust... not fun to breath in


I finished the whole project, working fairly slow, in about 3 hours.

Don't worry if the mortar got on the tile when it dries it will be easy enough to get off.  I used a plastic fork and a damp sponge and was done cleaning it off in less then 10 minutes.  But before trying to clean it off let it sit for at least 24 hours or your weight could mess up the tiles.


Almost there... 

Tuesday, November 29, 2011

About a year ago I was granted a dream.  Who knew that a cleaning appliance could be a dream?!?  Well, in my case it really was.  We had been so kindly been given a vacuum when we got married but between then and getting into our house it didn't like to work as well, I blame our carpet... it molts, not attractive, just saying (it's on our list to replace...).   But on that day that my one and only Dyson arrived and for everyday for almost a month I vacuumed.  I was in awe of the fact that carpet was clean... actually clean!  I have issues I know, I wipe it down with a damp cloth... kind of feel like Monica, less the little vacuum.

Almost a year later... still in love.  If you can get a good deal(woot): so worth it!