Saturday, July 7, 2012

Goodbye... at least for now

Our adventure is coming to a close.  My home is finished.  Each room complete.  I can't help but feel nostalgia. It's like senior year when you forget the exams, pimples and stupid homework and all that you can think of is all the good times.  Movie montages of school dances and walking down the hall laughing with friends only exchange dances with house parties and walking down the hall with playing board games.

How fitting that after all of this construction and let's be honest deconstruction it is come time for us to leave.  So as I say goodbye to our first and now newly rebuild home I walk through the empty bedrooms and walk down the barren halls being all nostalgic.  Now if only I could get a freeze frame of my with my fist in the air.

Thanks for caring to read our silly adventures.


Sponsored By:

Thursday, July 5, 2012

Our last project has come to a close.

Our guest bathroom.

First step as always is to realize that there is too much to do... have a small panic attack, breath deep and dive in any way ;P

Because of how old and rundown our guest bathroom was we had to gut it completely.  Step one was remove the base board then the cabinet and toilet.

Followed by the floor... well, not immediately but after the cabinet, toilet and GASP the Tub.  I guess the great thing about ripping up old linoleum is that it is so gross and decrepit that it practically is trying to remove itself!


The larger task this time was the removal of the bathtub.  Builders love these one piece units... great for no grout I guess but unfortunately because it is one piece they built into the frame... and thus is one big huge (yes, the redundancy is necessary) chuck of fiberglass.  So big there is no way to remove it from the house in one piece.  I looked up and searched for such a long time as to what to do.  Most all of them talk about how tedious the task is and use such tools as the Sawzal.  Not owning a Sawzal and determined not to buy one I looked for other options.  Step one is to use a box cutter: deeply score the sheet rock about two to three inches from all the edges of the tub.  


Next step is to use a hammer and a crow bar and wrench that sheet rock from the wall.


The tools for the next process... well what I used anyway, the getto fabulous:
Hammer
Screw driver
Crow bar


Remove all bathroom faucets, handles and what not.  
This was surprisingly easy.  The tub faucet just turns off.
The handles just unscrew and the show head is above this whole issue so it could be left alone.
I took it off anyway cause I was replacing it.


Oh, and did I mention gloves?  Cause this next part...well, if you didn't have gloves you be missing some fingers and have some nasty fiberglass spinters...
So I guess you could not use them...
But I suggest (and the internet demands) you use them, for we like your fingers.


My she-hulk came out as I did this next part.  You grab a corner and you wrench it towards the inside of the tub till is splinters off into hunks.  Like this... well, I guess that wasn't the most effective way to show you but then again I was doing this lonesome so I didn't have the arms nor the skill to capture the motion... but basically lots of sweat and pulling.


 For the middle sections and the whittling down towards the actual tub part: I went hillbilly on my tubs butt and just hammered away.  Creating week parts so that my sweaty pulling could go back to work.


The cabinet, toilet, tub, and floor were all out and it was time to go to work... same process as before.

But yet again we tile.


Replaced the old and gross light.


Sadly this paint looks super... well, not the color it is. It is a tan/tuscany feel.  but all the same that's not what this shot is about.  This shot is about the amazing set of towel, toilet and all that wall holders that my parents grabbed at a steal (got to love people with weird connections to toilet paper holders??? I sure do??? : P)

So to make is super easy this set came apart (with the help of an allen wrench) into three parts.  The actual holder, the actual wall mount and the pretty thing that covered and connected the two.  So me, being ... well, me I tried to figure out the simplest and straightest way to hang them.

I pulled them apart to grab the wall mount, pulled out my handy-dandy-baby level and I picked out my spot/area and used the level to make the base straight and then used my pen to mark the two holes.  Then, with no shock, I screwed screws...

like this:


then put up the actual mount...


Then covered it with the pretty cover...


Then put the last part on and used my ever so tiny Allen wrench (ie hex/pent-gon shaped rod)


Yes, this is the worlds longest post.  But I didn't want to do more than one, so suck it up and enjoy the stupidly long diatribe about my bathroom accomplishments... or don't.  Either way I won't know.


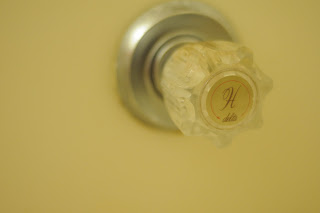
I picked out with the help of Lauri from Lowes this neat two head system... So beautiful


Super easy to install.  Plummers tape around the wall neck, turn... plummer's tape around the other joints and turn...


Then in came the cabinet, faucet, mirror...


And that is the story of our second bathroom.  Well that plus, if you are a girl and you go to Home Depot or Lowes for that matter your assumed knowledge is less then 0 and even if you tell them exactly what you need they will tell you are wrong... you will arrive home with the piece that you didn't need but they assured you did need... rinse repeat three times.

At times this knowledge assumption goes to my benefit: like I don't have to wait for someone to ask questions... it is as if they follow me around waiting for my nonsense to reach a head.


Tuesday, June 26, 2012

Before and After

After months of postponing, days of complaining and hours of working...

The bathroom (master) is finished.  Well, ish... but all the big stuff is done!  (still needing to grab a fitting mirror, shower head, and a cabinet over the toilet... but you get the gist!)

Took us long enough.  We have now, for the first time, two working bathrooms!  It is silly how little actually time it takes... way more money then time.  Here are some previous post walking through the process.


But officially: complete... well save for a mirror, carpet and the ever constant desire to renovate. 

What projects have you been postponing: get to it.  It is Way easier to finish once you start.


Sponsored by: 


Thursday, March 22, 2012

It's time to start again.

It's time.  Sadly there is no postponing, no thumb twiddling left to do. . . I must take on our other bathroom!

This time it is a bit harder.  Asside from the same thing I had to do in the last bathroom with pulling out the base boards, quarter round, floor, cabinet, toilet, tile and replace it all back again... and paint (I always forget that). This time we have to replace the shower/tub.  Unfortunately this house was built in the 80's which means a lot of things but in this case it means they built our tub into the studs...

This means that it is too big to get out of our house in one piece.  Even if we remove the door and frame it still will not be big enough.  So sadly we have to go through the process of cutting up our fiberglass tub bit by bit.
By Rachel Abi


This will not be fun but you will get to see the process!  You shaking with excitement yet?  Cause I'm shaking with nerves!

Today all I started with is removing the floor boards and quarter round.  I do it with as little damage as possible because I plan on reusing it once again.


Eekk but we are almost done with all the big projects in the house!

Sponsored by : 

Tuesday, March 20, 2012

It's not always forward motion

Things at the house have seemingly come to a grounding hault.  The bathroom... is well not where I want it to be.  The back bedroom looks like a supplies closet threw up...

But I'm okay.  I know that with time and sadly money that bathroom will be done and beautiful and that will take care of most of the back room's problems.

Why do I share this with you?  Simply to know that everyone has their problems.  Those days when you take a deep breath and hope that the back you hoisted to your back won't crush you.  Sometimes you have to set you pack down and know that it AIN'T going no where.  (yes, aint was necessary)

Today is a day to pause take into account all you have done and look forward to what you know you will need to do.


Thursday, March 15, 2012

Things you don't admit on a blog


I am tight.  Not in the "girl's tight"/hot kind of way but I am frugal/cheap/stingy... I just don't like to spend money. I don't.  Don't get me wrong I love stuff... I mean more than I should. I think that most things I come across are awesome for some reason or another (save for trinkets, bobles and other things that just don't speak to me).

Beneficially for a lot of reasons, both personal and business, this "cheap" nature as allowed me to keep out of debt.  Though raised in a family without money one thing I walked away with was a deep desire to be out of debt. To have a budget and work within it saving as much as possible for those times when you really need it.

One other thing about me you probably don't know and is going to sound odd to bring up since it is one of those topics never to speak of publicly but I am political.  I like to be aware. I am totally cool with people not agreeing with me and the only thing that makes me upset is when I hear people basing their votes by the appearance of a candidate... for any office.

How do these two ideas come together?

The US debt deficit.

I am not sure you are aware but the US Government owes a lot of people a LOT of money.  This year the government has to borrow $0.40 on each dollar. It would be like buying everything in your life on a credit card and then sending the credit card company a nickel each month and thinking it would be able to pay it off... ever.

Did you know that the US dollar is the world's global currency? I'm sure you were smarter than me and knew this and what this means but just in case:

Simply put right now most countries in order to money for goods, the country has to have US dollars. Ie: if Mexico wants dolls from China they would have to take their own currency and put it into us dollars before making the trade.

The US Government is so in debt the only way it can pay even the interest on the loans is by printing more paper money: this devalues the dollar.  Not just for you and me but for the world.

This devaluing has been going on for years!  And so many so much more intelligent and brilliant than me see that the US dollar will not be able to maintain it's value and thus will no longer be the Global currency.

What does this mean?

Simply, the dollar will become worth very little.  Right now you know what $100 dollars means, the concept, what you can buy but when the $1 is no longer worth anything... it is hard to conceptualize.

Look at Germany after it's collapse after WWII, people started burning their currency because it was worth more as paper then money.

Look at England in the 60's their government got broke enough that they couldn't pay government workers to take care of trash.

I say all of this because it is scary. The prospects of what could happen and the fact that at my age of 25years most people I know do not even know that the US Government is in a lot of debt let alone what that means.

It is scary for those I love. It is scary the scenes from books I've read and movies I've watched pop to mind...

If you don't believe me there is a long but worth while video you can watch:

http://pro.stansberryresearch.com/1202ENDOFAMR/6PSIN316/

I man much smarter than I am walks you through what he knows. It is long but worth you while.

Written by Rachel Abi


Tuesday, March 13, 2012

She's a freak hoooussee...

Do you ever feel like an oddity?  Like kind of a freak?

Sometimes I sit in awkward silence judging myself for being weird. This morning it is focused on the fact that I love organization but reject schedules.  Don't get me wrong I still have a schedule, even for blogging I have my day broken up into 30min segments as to keep from overlapping too much and wasting time. For example: commenting on blogs is broken up because not everyone posts at the exact same time.  

Yet despite my understanding how helpful a schedule is I still reject it. I blame my mother, as we all do for way to many things, in this case I feel like it is just.  When I was growing up my mother was super scheduled.  We had our time scheduled, our chores scheduled and we were allowed to play with one toy at a time, after which we had to put it exactly where we found it before we got another. This may sound ridiculous to some of you but to be honest, I respect my mother for teaching me discipline and the importance of order and cleanliness... I guess my rebellion is not liking that schedules rule.

No matter how much I am shown otherwise I reject schedules everywhere possible... so mainly when to eat... that's about it.  "Yea, well you say I have to eat breakfast _____?  I'm just going to eat an apple and then have a big brunch!  What'cha going to do about it?"  Yes, I do give myself attitude.  

Written by Rachel Abi


Thursday, March 8, 2012

Budding


I can't believe how fast time flies... I mean really it is spring already!  

I'm excited.... except for the whole cutting grass thing.  I mean really, who is a fan of that...Not that I have room to talk since I am pretty nerd-y.

There is such promise at the beginning of each season and with spring and all it's buddings... it so beautiful.  This spring promises lots of change for Chris and me. 

Today I am at the Fix with Jasmine star... and that's a big part of the change.  I have been doing wedding photography for years now but I am determined to make it work... to plug on. 

Oh, spring be kind!
Gussy Sews Inspiration Workshop!


Tuesday, March 6, 2012

Getting your blog into shape:the link up fiasco

In response to my dear Rambling Heather, today's post is all about virtual organization part one:

The link up fiasco

I came late to the blogging game, for sure.  In college I had a random blog but lost it years ago to the way life gets busy... who am I kidding is busy.  But two years ago there was a huge change in my life, my husband and I quit our jobs to buy a business.... alas it didn't work out but all the same in launched a completely new BOOK (not just a new chapter) in our lives.

With a blog the point/reason will vary but any which way it is nice to know you are being heard, being looked at.  When I started blogging I looked around to see what would be great way to do this and in laid a system already in place: link ups.

One of the ways Google places your site higher on the search list is by the size (amount of content) and the number of sites your linked with.  I looked around and decided to map out the options of link ups.  I wanted to come up with a better/more effencient way to link up.  I started marking down the link up options on Monday I found, I did searches, followed buttons, gathered information for each day of the week and started with this horrible looking piece of paper:


I have four blogs but only three do I link up with other sites so I did this chart with the intent of three sites across the five day "work week".  I slowly weeded out the link ups that asked too much, that were too specific in their desires making it impossible to link up with more than one blog in a day.  Till I whittled it down to this spread sheet:


Sorry it is hard to see but it is the same list idea as above but now instead of having to type in each link up site I can click and jump right over.  Most days there are only a handful of sites that have a close enough theme that one post can touch on it all but Wednesdays are completely different.  Everyone and their mother's brother does a Wordless Wednesday: it is like a global blogging hug where we can all come together with one project and beneficially for any that are participating you can link up with all of them.  I know of over 100 sites that do link ups for Wordless Wednesdays.

The number one thing to remember about linking up is courtesy!  Make sure if you are linking up with a blog you have their button, if they don't have a button just do a straight link back.  You are getting the benefit of their readers make sure you give back.  If a blogger doesn't like you linking up, don't whine accept it, say sorry (whether you think you did something wrong or not) and move on.

If you are nice to others, comment, praise, mention others the blogging world is a reciprocatory place!


Thursday, March 1, 2012

Organized Chaos


One of my goals when I started this blog was to talk about organization... I haven't done that a bunch.

There isn't really a right way or wrong way to organize something.  Just because "Suzy" likes the label maker and Rubbermaid containers doesn't mean you have to too.  "Organized Chaos" is actually a legitimate style of organization... so long as it actually is ORGANIZED chaos... and not just chaos.

I do a bit of OCD organization but I also have my "Organized Chaos" areas too: one being under our bathroom sink.  It doesn't look neat and pretty but it all works.  Things we use on a regular basis are at the front and refill items are at the back.  All "getting" ready products are in the same stack and all grooming aids are in a different stack.  

The point is: no organization style is better than another.  If you do better with labels so that everyone knows where it goes: GREAT!  If you do better when things are stacked: AWESOME.  If you do better with having messy baskets that divide up your categories: AMAZING.  

If it works for you and your family: don't let someone look down on you for it.  Be you in every way!  Even down to the silly things like organization: find your organizational personality.

Tuesday, February 28, 2012

Won't last past the Apocalypse but. . .

I don't ever feel like I have enough storage space in a bathroom.  I'm pretty sure each bathroom should have a closet built in for all the stuff you actually want to store in your bathroom. . . or am I alone in this "way too much stuff to space" thing?

All the same I went looking around for options and found out that above the toilet cabinets are silly expensive for even the mesh boards with sticker like material over it to make it look like wood you're looking at around $100 or more.  That seems a little silly to me (when it is not a higher quality cabinet at least).  

So I set out on a voyage to find a solution that won't break the bank when I came across this.


I was walking around target and found it.  It was $15 and wasn't exactly what I wanted but it was a price I couldn't argue with.


The instructions and construction process was fairly simple, took me all of 5 minutes to get it all put together.


Hanging wasn't too bad either.  The screws go through the metal and so it has a big enough space a pen can go through it and mark the wall so there wasn't really a need to measure if you have a level and are okay with a little guessing.


Next came the drilling.  The cabinet is about 18" so it doesn't work well with hitting 2 x 4's so the kit comes with the wall brackets.  My drill head choices were not the right size so I simply and slowly drilled in and circled the drill around the hole.  Slowly removing a bit of drywall till I got the hole to the right diameter.  


Next you just take a hammer and tap the wall bracket in place.


Then screw it in place


And fill it with all your stuff

Though it isn't exactly what I wanted and won't last after the Apocalypse comes for $15 I couldn't much beat it and you got to love an easy insulation process!