Showing posts with label recipe. Show all posts

Tuesday, November 22, 2011

Not just your average turkey

While you prep for you Thanksgiving this week remember just cause you are having turkey doesn't mean that it has to be your average turkey.  Have fun with it.  Change it up.  

That's what I did, just a little early since I wouldn't be making Thanksgiving dinner this year.  I made a peach mesquite turkey. You can make your turkey any way you want, any toppings, rubs or oils.  Just keep these keys, to make sure that however you make your turkey that it is a moist and delicious turkey:

1.  Do not stuff your turkey with any bread products, especially not stuffing.  I know it makes the stuffing all the better, but it makes your turkey dry.  Almost same taste to the stuffing pull some of the turkey dripping from the bottom of the pan.  Get the taste without the dry turkey.

2. Stuffing the turkey can be great.  I stuffed mine with peaches but other fruits and vegetables can add great flavor to the meat.

3.  Rubs can be great to keep moister in, otherwise thoroughly apply oil to the outside of your turkey.

4. Keep your turkey covered pretty tightly (Aluminum foil tight is fine enough).  Only uncover for the last 20 minutes or so.

5.  And almost most importantly:  For your best skin and moistest of turkeys insert butter tabs under the skin (I'll give instructions on what I mean exactly below).  It makes the skin crisp up a bit and look beautiful and infuses the mean with a little extra love and not too many extra calories.


Step 1: Clean your turkey.  Pull off the cover and pull out the giblets and neck.  Rinse with cold water thoroughly.  

Step 2:  Depending on the size of your turkey (mine was 13lbs) make a handful of 1.5-2" slices (I did four one for each quarter of the turkey).


Step 3:  Insert tabs of butter into the slices you made, make sure to put them under the skin fully.  (amount of butter can range but I used right around a TBSP for each slice.)


Step four: If you are going to stuff your turkey, here is where you stuff it (I got peaches for really cheap in the summer and froze a bunch and used those to stuff my turkey)


Step 5: Topping/Rub/Oil.  I used a bit of Olive oil and rubbed the skin of the turkey moist so that the rub would stick.  Then I used the spices in my cabinet to make a rub (in this particular case I was given a mesquite steak seasoning that I thought sounded pretty good.)


This is simply to give perspective on how "Stuffed" or not "Stuffed" my turkey was.  You don't need it jammed packed full to do the job.


Then bake it as per suggested on the package for weight.  I have a roasting option on my stove so I used that in my process but regular old baking works wonders too!  If your package doesn't say I would suggest 325 degrees and look online for a estimate to be sure but for my 13lbs turkey I roasted it somewhere around 4 hours.  When in doubt a meat thermometer is a life saver (you can get one pretty cheap, under 15 bucks, that will do the trick... just make sure the part that goes in the turkey doesn't get bent... doesn't work too well after that, go wonder).  

Go out and do wonders with your turkey.  You change up with shock and surprise your family in a good way!


Tuesday, October 4, 2011

Places foods

Do you have foods that make you think of locations?  Well if you don't you should, because clearly Mahi Mahi is supposed to make you think of Maui.  I mean really it is one letter off!  It is asking for it.  


I was at the Teet yestureday and picked up some Mahi cause it was on sale $6.99 lbs wild caught and it is delicious.  I wasn't sure what I wanted to do with it.  I haven't really cooked Mahi before.  So I pulled out my handy dandy internet (yes, it is my internet... Al Gore gave it to me) and pulled up some recipies for Mahi.  I looked at about 4 and then decided, as always, to wing it.


I took the suggestion to put some type of lubricant down in the buttom: less burning.  I chose olive oil.  Then I went with a asian feel.  I topped the fish with Terrioki sauce, balsamic vinegar (only a little though because the crazy person that my husband is doesn't like it... silly, just silly), ground ginger, salt, pepper and a little butter tab on top.


All the while I had a bit of sweet potatoe on the stove top.  Our dear friend Joey brings up stuff from his family "garden" (means farm to any of you who are like me and didn't grow up with acres of plants growing out back) and shares them with us.  I used simply salt, pepper and bit of butter and that's it.  Since the fish was busy with flavors I wanted something more simple for a side.


I started it  at 450 degrees, not because it was best for it but I was finishing up some bread in the oven but didn't want to wait to put the fish in.  So it was in at 450 for about 6 minutes and then another 20 or so at 350 degrees.  You may want to cook it a bit longer cause we like to stay away from the well done side.  Chris likes it raw if it is sashimi grade ( don't get me wrong I like sushi but when I think fish I think cooked),  I'm pretty sure he is part whale.


With dinner we of course broke out the amazing and fantastic oil and herbs dipping stuff... SOoooo deilcious. 

Thursday, July 7, 2011

Leftovers = resources!

So I love re-purposing leftovers.  You know what I mean?  I like taking the vegetables that I made for dinner one night and putting them into a soup the next, or taking roasted potatoes and making them smashed!

Last night: I took leftover BBQ chicken and ripped it up and used it for Southwestern Pot Pie!

Step one: crust!  You can make your pie really simple and buy crust (not too bad priced either) but I like to use my (you are going to think I am on a soap box... but I really just like fresh flour SO much) fresh ground whole wheat flour from The grain mill of wake forest.

Step one: crust
Crust is SUPER easy... you almost can't go wrong.  Take flour, butter/shortening, salt and water... or you got the recipes that have milk and eggs... crust is pretty fantastic.  Main thing: pastry cutter(the thing in the picture... couple bucks at target/walmart) = awesome. 


Step two: filling I do it SO simple, cream of chicken, cream of celery, frozen mixed vegetables and then spices (mainly make sure to use salt and pepper) you can add whatever you want so long as they smell good together you'll be fine.  I used Chipolte pepper, crushed red pepper, chili powder, tarragon, and of course salt and pepper. 


Step three: roll out the pie crust!  If it breaks apart... Its OK!  Mine did.  I'll tell you a secret: it tastes the same!


Step four: Pile it all in into the crust


Step five: put the crust on on the top (like I said: mine broke... still tasted great)


Wednesday, June 15, 2011

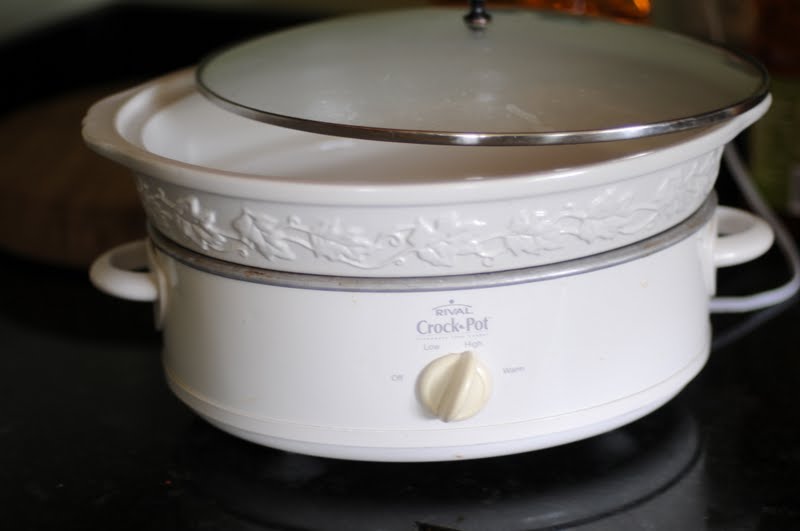
C-r-o-c-k-p-o-t that's how you spell...

Right before Chris and I got married we ran into a friend of ours who had just got married.  She was so excited for us.  She said, "You'll love being married, I mean I do!" She had just gotten married a month before and was sweetly enthralled.  As she is telling me about all the joys of our soon to be marriage she stops dead in her tracks and says, "You have to get one of these amazing things!   It is called a "CROCKPOT".  and you can just put stuff in it and sit all day and it is great every time.  You HAVE to register for one of these!"  She was being so sweet and helpful I didn't have the heart to tell her I knew all about crockpots and that I actually owned one, instead I said, "Oh thanks!"


What was the purpose of the little anecdote?  Not much of anything save to say that a lot of people do know about crockpots...

I have another friend who cannot seem to figure out her crockpot.  Isn't comfortable with it and so doesn't use it.  This isn't a bad thing but it got me thinking how some people though know about a crockpot don't know the key secret to making crockpot dishes.

Oh, yes there is a key secret and I am in possession of it!  Ready, it is life altering!  DON'T MESS WITH IT.  The key to a great crock pot dish: meat, sauce, water, turn it on and LEAVE IT ALONE for hours.  No turning necessarily, no messing, no playing, and no checking needed.  This is a difficult concept because everything we know about cooking is that attention is needed but not true with a crockpot.  Resist the urge to poke and prod.

So with this thought I made dinner:  Catalina Chicken with roasted potatoes 


 Step one: pull crock pot out


Step two: put chicken into CP with water


Step three: add Catalina dressing (amount... your choice)


Step Four:  Wash some red skinned potatoes


Step five: Cut up said potatoes into bite size pieces and pour some olive oil on top and dust with your choice of spices (I chose garlic, pepper, salt, rosemary and a little copped onion)  Whatever you put it will be great.  If you question a spice: my go to is to smell the dish and then smell the spice, if it smells off from the rest of the dish don't use it.


Step six: Carefully remove the chicken from the CP (it will be falling apart) top with a little of the sauce from the pot.  Add some potatoes (and whatever else you want to the dish) and you're good to go!


I decided to do a little cinnamon sugar butter: just add cinnamon and sugar to butter till it tastes good to you!  You can't go wrong.


This has rocked your world hasn't it! ;P  Well even if it hasn't maybe you will be challenged to pull out your CP and do something you haven't ever done!  

Friday, June 3, 2011

Eggplant Parmesan

First time making.  In fact, I had never eaten it either.  I mean I have eaten Chicken Parm but not Eggplant Parm.  It is really pretty easy.  I did a regular marinara.  I put about a .5 lbs of meat in the sauce (Chris loves meat).  I sliced the Eggplant pretty thin. Dipped each piece in milk then into the breading.  I used the same freshly ground whole grain whole wheat flour that I usually use, garlic, basil, parsley, a small bit of sage, salt, pepper and I used just a couple of ritz crackers, broken into crumbs.  Then saute them in some olive oil and butter till a golden brown.  I put them on a cookie sheet and topped them with mozzarella and baked at 350 for 10-15 min.  All the while have water boiling and I dropped my noodles in just before I put the eggplant into the oven (prefer to get the noodles done earlier rather than later).