Tuesday, January 31, 2012

Ways to save

One of the great things about owning a house is also the worst: you own a house.

Our house we bought a few years back is an older stick built home that has it's issues one of which is really bad windows.  Pretty sure they are made of thick pieces of plastic and gum.  Everyday I can feel air breezing through them and making it's way into our home... not a fan.

This winter I decided to do something about it.  I went to my local hardware store and picked up window insulation kits and I will show how I installed them and hopefully save you some time and irritation that I endured. 

You will need the appropriate number of kits (most kits do about 5 windows)
Damp rag (and I also used a tooth brush)
Scissors
Tape (just in case: great for patching a small burned hole in the plastic)
Hair dryer

First and foremost you will want to remove any curtains or blinds you have up to give yourself the free window.  Then wipe down all the surface: focus on clear and dust free corners: VERY IMPORTANT.


I used a old tooth brush to make sure that corners were free of debris.  Keep scissors handy at all times during this process


Next (after the paint is fully dry from the wipe down) use the adhesive that comes in your kit and roll your way around the window you will want to be about an inch of space from the actual window as to make sure the plastic has room to move if necessary.  After you have the tape exactly where you want it press down firmly and run your finger over the length of the adhesive (leaving on the cover).  Let sit for upwards of ten minutes the adhesive will adhere to the paint and stick much better if you allow between 10-20 minutes of rest before moving on.  I would start one window and move on to prepping a few then jump back over.
By Rachel Abi


Make sure that your tape over laps: you want no place for air to escape. 


Next measure out and cut the plastic to cover the window with an extra amount (about an inch or so) of plastic on each edge past where it will attach to the adhesive.


Slowly making your way around the window remove protective strip from outer line of adhesive.


Now it is time to attach the plastic

Start at the top center.  Slowly work your way evenly down the sides.  The lest extra and wrinkles you have the better but you also don't want it super taught (not that you will be able to get it really taught but as a warning just in case).


Some of my corners didn't adhere as well as you would hope I cheated and added some extra tape on the edge just in case the adhesive didn't hold.


Now it is time to use your hair dryer: when you start the process choose a corner and slowly work you way out.  Don't get the hair dryer too close or you will burn a hole but don't leave it too far or it won't do the trick (ie: don't go closer than 1").  When you start the window will start to look like the picture above.  Slowly working your way around the window the plastic will get clear and taught.


Till finally it is just like looking out a regular window and no one but you and your energy bill will be the wiser.

It is worth it in the end but it can take a while to get in your groove.  If you have to do two windows a day for a week: then it won't take up a chunk of the day. 

Thursday, January 26, 2012

Small touches

Fingers drum across pursed lips.  Feet pace back and forth in front of a huge display wall of light fixture.  I am LITERALLY the worst when it comes to decisions like this.  I stood there at that wall, knowing quickly what fixtures I didn't like but struggling as to what ones I would want to forever reside on my bathroom wall.  Yes, when Armageddon comes this light fixture will still be on the wall and I could never take it down and replace it if I decide later that I don't like it... well, at least in my mind that is how that works.

So I stand. . . and stand staring at a wall frozen unable to make a decision.  My phone is in my hand but unfortunately our local Lowes is the black hole of cell phone coverage.  

Finally after what seems like a half a day (not even close in reality) I have narrowed it down to three options and to finish it off I just chose the one that was on sale: thus is the epic of a story for what lead to this post.

It is amazing how a small thing can keep you down.  Putting up a light is not that big of deal.  It is literally twisting 3 sets of wires together yet somehow between going and picking it out and being sure enough to actually open the box it held us up in finishing our bathroom.

So what do you think of my choice?


After we finished the light we moved on to replacing the base board and quarter round.  Before we pulled up the floor I pulled off all the molding so that I could save it and use it again.  This was a bit more tedious then I would think but in the end not having the tools or wood to replace them it was easier and WAY cheaper.  Make sure you have sand paper though!  To make sure that when you repaint it comes across as a clean coat and not have weird layers on it.


Finally for this post and I feel most important: the toilet!

I was intimidated by the thought.  Not so much cause the process was difficult but more because of the implications if you get it wrong.  All the work, effort and money could be a waste if this one step didn't go right.  Such a simple process. . . seemed too simple but it wasn't.

Toilet base (check)
Wax ring (check)


Flip the bottom of the toilet base up to face you and place the wax ring around the opening of the base of the toilet and push down hard (this is all on the wax ring packaging... not inventing even a part of the wheel).  The wax will come free from the plastic container.


Flip the toilet base over and match up the plumbing and holes and screws then. . . 

Drum roll please

Push down with all your weight.

Screw the bolts down as far as they will go then leave it for 24 hours.


Repeat the process the next day tightening the bolts down far then follow your toilet's instruction as to hook up the tank to the base.  (ours was pretty simple: two screws and one hose).


Finally: enjoy?

Tuesday, January 24, 2012

Cover up the baby

You'll notice on the last post about the bathroom it ends with it being blue... what is in my opinion a baby blue... not acceptable unless you have a baby AND it is in that baby's room... but that's just me.

 I really didn't like the blue that was chosen (long story but it was not my choice), so I had to take it down a notch thus the dark grey texturing on the walls.  I was in such a hurry to get that blue toned down that I completely forgot about documenting the process. 

Simply I did a linen weave look.  


MAKE SURE TO TAPE or you will have a huge mess on your hands.


Using a STIFF (really stiff) brush and do a light layer of paint (barely marking the walls) one direction (vertical or horizontal which ever you choose first).  


Let that dry and do the same thing the other direction...  
The process is very basic.  Patience is key to having an even spread and not have big globs!


Do you think it is an improvement?


Thursday, January 19, 2012

"My Bedroom"


By Rachel Abi
Sounds like the start to one of those "how well do you know this person" games.  Sadly it is not.   

I once heard that when decorating a house the first room you should decorate is your bedroom, to keep a lively... certain type of life.  I do not know who told me this nor if it is true but it makes me wonder.  I have not taken that advice in my home.  We bought a little ranch style home a few years back and have slowly be redoing it and we are almost done: all that's left on the inside is one bathroom, a few small touches here and there (light fixtures mainly), and our bedroom.  It is kind of sad looking right now.  Having just been given a fresh batch of clothes (got to love giveaway bags) it sits in a pile on one side of the bed begging to get organized and used.  There are pieces and parts to the bathroom we have not yet finished sitting around.  When I look around the room I wonder who actually takes that advice.  Not that it is bad advice just that it seems a lot more pragmatic (hence why I did it the way I did... bit too practical for my own good) to decorate the areas to be seen often then where you sleep.   Don't get me wrong I am giddy over finally doing some decorating in my bedroom!  

Do you ever stare and wonder: what should I do?  My bedroom is like a blank canvas... just too many ideas. And no decisions.  If you'd like and have the time feel free to leave suggestions for what we should do!

Gussy Sews Inspiration Workshop!

Tuesday, January 17, 2012

Crafts for the wedding.

 I can finally show you some of the projects I was working on for my sister's wedding.  I ended up being over the decor for the wedding.  So I made banners and two "here comes" "the bride" signs.

First came the signs


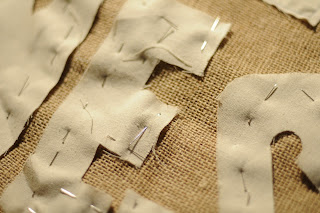
For the "here comes" and "the bride" I took burlap and cut it to size (that is the size that I wanted to signs to be).


Then I used some creams material and cut out the letters by hand but they have tracers that can be used, that are awesome.


I laid them the letters and pinned them.


Then came the banners. 


I used the same cream and burlap materials from the other signs.  
I wanted a imperfect look so I cut it out by hand but stencils can make it a bit easier.


I did a layering to make the letters (standing for Sarah and Stephen) stand out!


I attached them to a matching piece of yarn that would be long enough to attach to anything that I would need to attach it to.


I took all the material I had using for all the other projects and used them for basic banners for the walls.  Cut carrots out and attach them to yarn.  I folded material over and cut out the carrot like shapes (making almost a diamond shape).

And this is the final product for both!


Thursday, January 12, 2012

Failure

So I totally forgot that I said I was going to continue the organization train... Ooops.

Okay so getting back on.

Another great way to start getting organized is clearing out and organizing something you don't use on a regular basis. I like to do things like my household cabinet, we all have one.  Filled with light bulbs, extra cleaning supplies, and other random needed household items.  The best way for me to organize is to pull out everything.  Organize the different items and dis-guard anything I don't want before trying to organize where they go in the cabinet.  The largest thing in organization is the ability to dis-guard unusable items.  It is a difficult task but it is extremely necessary.  More often then not there are things in your house, closet, kitchen that you will never use or rarely use.  The enemy of an organized home are one use wonders.  Unless you make a whole lot of doughnuts the "doughnut maker" is unnecessary, much like the "Perfect brownie maker" or the "mini pie maker".  These devises though they might sound need crowd and already full kitchen with clutter.  Unless you are using an appliance a few times a month: it is unnecessary.  There are other more efficient ways to do whatever that appliance might do.  A pan with some oil in it and dough will make just as great doughnuts.  The oven does wonders for pie ; D

My point is take it small.  Getting overwhelmed with the task ahead doesn't help anyone, but know that throwing stuff away is a huge and necessarily part of getting organized.   And this is coming from the queen of free, the lover of never spending money.  I am all for storing something you will use: toothpaste, running shoes, sugar...

Be encouraged: you can have a home you are proud of you can have an organized home and it doesn't have to take a lifetime!


Tuesday, January 10, 2012

Salmon cakes

So I have a game I like to play.  When my cabinets are low and I don't have time to go to the store, I look through my cabinets and see what I can make with what I have.
This particular night I made Samon cakes with a lemon cream sauce with some rice.

How?  I had two cans of Salmon and some old bread and spices.


Grate old bread till crumbs.


Open and mix the Salmon and crumbs


Add herbs


Grab and patty the Salmon


Pan sear the cakes in olive oil, just till darker than a golden brown (just make sure that they don't burn).


Putter, lemon, olive oil, heavy cream and herbs (you can add whatever you want to taste)


While I finished the sauce a kept the cakes warm in the oven.


After the cream is added this is what the sauce will look at.


Here is the finished product!

By Rachel Abi